After waiting for what feels like forever, your gallery finally arrives! And chances are, it’ll show up as a Pic-Time link. If so, keep reading for tips and tricks on how to best navigate your gallery.
Pic-Time Basics
Using Pic-Time is easy and simple! Here are a few of the basics to get you started.
Downloading Your Gallery

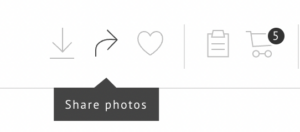
Once you’re logged in, the first thing you want to do is download all of your gorgeous photos! After clicking the download button on the right-hand side of the navigation bar, you’ll be prompted to download web-size or high-resolution photos. As the name suggests, web-size photos are perfect for online use, such as social media and websites. High-resolution photos are best for printing, including wedding invitations and photo albums. I usually recommend downloading both high-res and web-size and saving to your computer or the cloud so you have both options available to you whenever you need them.
Favoriting and Hiding Your Photos
After you’ve saved your photos to your computer, scroll through your Pic-Time gallery to relive all the special moments! To “favorite” a photo, hover over an image you love and click on the heart button in its bottom left corner. To see all your favorited photos in one place, head over to the heart icon in the navigation bar.

Any photos you favorite, I will be able to see on my end. Not only do I love seeing which photos you love, but this also helps me choose which ones to share on social media and in blog posts!
Alternatively, you can make photos private so that only you can see them. Click on the eyeball icon in the upper right corner of any image to hide it from guest visitors.
Sharing Your Gallery With Friends and Family

Speaking of sharing your photos with guests, now that you’ve had a chance to look through all your photos, you may want your friends and family to experience them, too! To do so, click on the share icon in the navigation bar to share your entire gallery with Facebook or Pinterest. You can also send it to your loved ones via email, Facebook message, or link.
If you want to select specific photos to send to others, hover over each individual image and click on either the email or Facebook icon in its bottom left corner to create a collection. Once ready, head to the share icon in the navigation bar to share with Facebook, Pinterest, or directly to your people as an email.
With guest access, they’ll be able to see all your photos (except the ones you’ve hidden) and can download web-size versions of them. They’ll also have access to the shop, which I will be covering next!
Exploring Pic-Time’s Online Store
While viewing and sharing your images online are great, there’s nothing like a professional print to really take you back to your special day. Whether that’s admiring a framed photo of your favorite moment on your wall or flipping through a professionally created album and reliving all your best memories, you’ll be so glad to have physical photos that you can enjoy whenever you want! Luckily, Pic-Time makes it super easy to design and order all kinds of prints.
Options Galore
One of my favorite features of the shop is just how many print choices you have. Options include standard matte and semi-gloss prints, greeting cards, framed prints, canvases, metal prints, calendars, fine art albums, and so much more. Whatever you are looking for, it has got you covered!
Smart Design
Speaking of fine art albums, Pic-Time’s software will automatically create a smart layout based on your most viewed images, taking the stress out of arranging your photos and saving you precious time. You’re also able to edit each page to your liking, or if you want to create your own layout from scratch, you can do that too.
While you are absolutely free to print your photos anywhere you want, Pic-Time makes it a breeze to order professional-quality prints and albums through a printer that I fully trust. Plus, I often have sales around the holidays, so make sure to be on the lookout!
Once you get the hang of it, Pic-Time is an amazing tool to download your gallery, share it with your loved ones, and order prints! But to relive all your special moments, you’ll need to first have it documented! For ways to make your engagement photos as stunning and memorable as possible, read my blogs about 3 Tips for Rocking Your Engagement Photo Session and The Complete Guide on What to Wear for Your Engagement Photography Session.
Ready to book your own Oregon engagement or wedding photographer? Click on the link below to inquire!